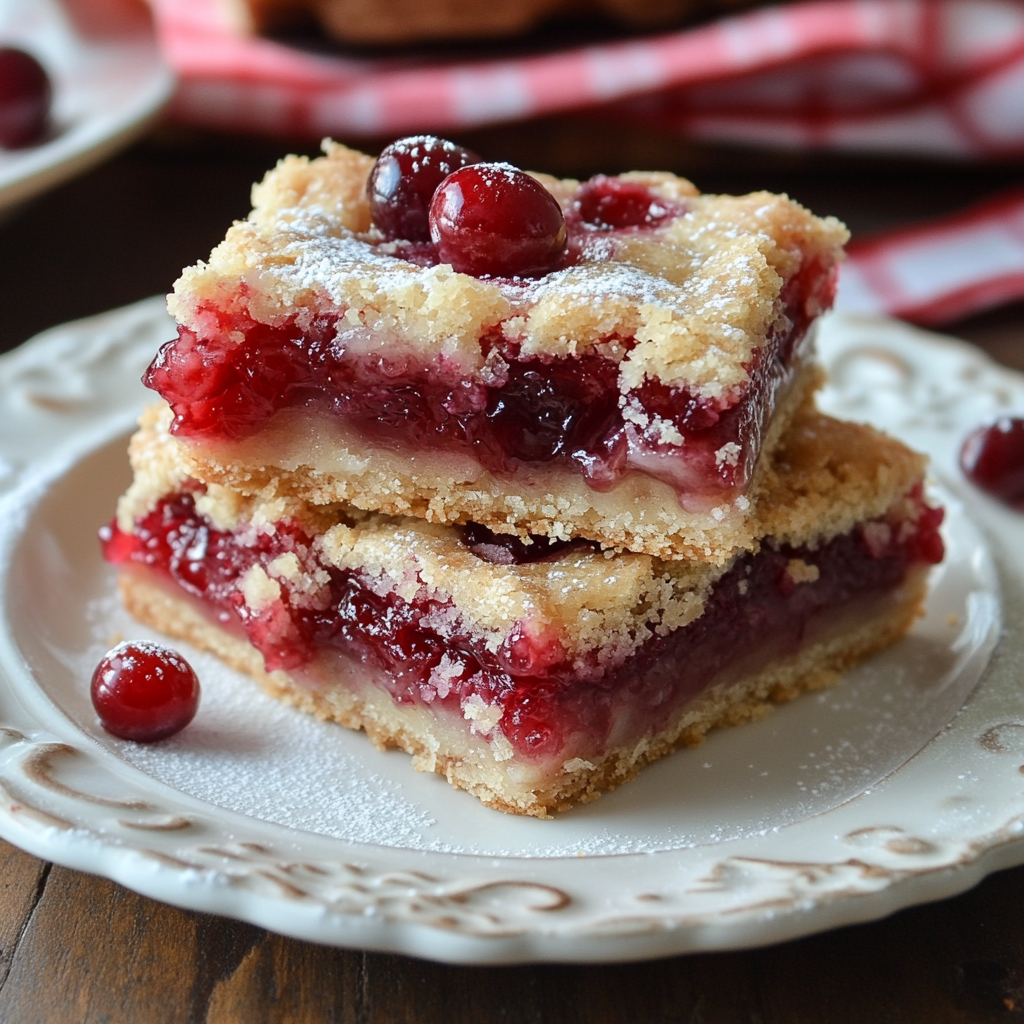
Easy Cherry Pie Bars: A Simple Cherry Dessert to Savor
Cherry desserts hold a special place in my heart, especially this Easy Cherry Pie Bars: A Simple Cherry Dessert to Savor recipe that’s been a family favorite for years. My grandmother first shared it with me during summer holidays when cherries were in season. It’s simple to make, yet bursting with sweet and tart flavors enhanced by a hint of almond extract—a secret twist that makes these bars irresistible. Whether you’re a busy parent, a student craving a quick treat, or a baking enthusiast looking for a new classic, this homemade cherry pie bars recipe is your go-to. Plus, if you love discovering new recipes, be sure to browse our Pinterest boards where we share plenty of sweet and simple recipes, including an entire collection dedicated to cherry delights.
Why You’ll Love This Recipe
- Quick and Easy: This cherry dessert requires minimal prep time and is ready in under an hour.
- Delicious Flavor: The combination of sweet cherries and almond extract creates an unforgettable taste experience.
- Versatile Serving Options: Perfect for parties, picnics, or just as a delightful everyday treat.
- Family Favorite: A recipe that brings everyone together around the table to enjoy homemade goodness.
- Perfect for Beginners: Even novice bakers can create these delicious cherry pie bars with ease.
Tools and Preparation
To make your Easy Cherry Pie Bars, you’ll need some essential kitchen tools to ensure smooth preparation.
Essential Tools and Equipment
- Mixing bowl
- Electric mixer
- Measuring cups and spoons
- Baking pan (9×13 inches)
- Spatula
Importance of Each Tool
- Mixing bowl: A large bowl helps you combine ingredients without spills.
- Electric mixer: Saves time and effort when creaming butter and sugar.
- Measuring cups and spoons: Accurate measurements are crucial for the best results in baking.
- Baking pan (9×13 inches): The right size ensures even baking of these delicious bars.
Ingredients
For the Bars
- 1 cup softened butter
- 1 cup sugar
- 2 large eggs, room temp
- 1 tsp almond extract
- 1 tsp vanilla extract
- 2 ½ cups all-purpose flour
- ½ tsp salt
- 1 (21 oz) can premium cherry pie filling
For the Glaze
- 1 cup confectioners’ sugar
- 1 tsp almond extract
- ½ tsp vanilla
- Milk as needed
How to Make Easy Cherry Pie Bars: A Simple Cherry Dessert to Savor
Step 1: Preheat the Oven
Preheat your oven to 350°F (175°C) to ensure it reaches the right temperature while you prepare your ingredients.
Step 2: Cream Butter and Sugar
In a mixing bowl:
1. Combine softened butter and sugar using an electric mixer until creamy.
2. Add in the eggs one at a time, mixing well after each addition.
3. Stir in almond extract and vanilla extract until fully incorporated.
Step 3: Mix Dry Ingredients
In another bowl:
1. Whisk together flour and salt.
2. Gradually add this dry mixture into the wet ingredients until just combined.
Step 4: Prepare the Baking Pan
- Grease your 9×13-inch baking pan lightly with butter or non-stick spray.
- Press half of the dough evenly into the bottom of the prepared pan.
Step 5: Add Cherry Filling
Spread the cherry pie filling evenly over the pressed dough layer.
Step 6: Top with Remaining Dough
Dollop spoonfuls of the remaining dough over the cherry filling so that it covers as much surface area as possible.
Step 7: Bake
Bake in the preheated oven for about 35–40 minutes or until golden brown on top.
Step 8: Cool and Glaze
Allow the bars to cool completely before preparing the glaze:
1. In a small bowl, mix confectioners’ sugar with almond extract, vanilla, and milk until smooth.
2. Drizzle over cooled bars before slicing into squares.
This easy cherry pie bars recipe will surely become a cherished addition to your dessert repertoire! Enjoy every bite!
How to Serve Easy Cherry Pie Bars: A Simple Cherry Dessert to Savor
These easy cherry pie bars are delightful on their own, but you can elevate the experience by serving them in various creative ways. Here are some serving suggestions that will make your cherry dessert even more enjoyable.
Pair with Ice Cream
- Vanilla or almond ice cream complements the sweet and tart flavors of the cherry pie bars perfectly. Serve a scoop on top or alongside for a delightful contrast.
Add Whipped Cream
- Light and fluffy whipped cream enhances the richness of the bars. You can use store-bought or homemade whipped cream for an extra touch.
Drizzle with Chocolate Sauce
- A drizzle of chocolate sauce adds a decadent twist. The combination of cherries and chocolate is a classic that never fails to impress.
Sprinkle with Nuts
- Chopped almonds or walnuts provide a crunchy texture that balances the softness of the bars. This adds both flavor and visual appeal.
Serve Warm
- Warming the bars slightly before serving brings out their flavors and makes them extra comforting. Just pop them in the microwave for a few seconds.
Top with Fresh Cherries
- Garnish each bar with fresh cherries for a burst of color and freshness. This also enhances the cherry flavor in each bite.
How to Perfect Easy Cherry Pie Bars: A Simple Cherry Dessert to Savor
To ensure your easy cherry pie bars turn out perfectly every time, consider these simple tips. They will help you achieve the best results while making this flavorful dessert.
- Use Quality Ingredients: Opt for premium cherry pie filling for richer flavor. The quality of your ingredients directly impacts the taste of your dessert.
- Chill Your Dough: If your dough feels too soft, chill it briefly before pressing it into the pan. This helps create a firmer base and ensures cleaner edges when cut.
- Evenly Spread Filling: Take care to spread the cherry filling evenly over the crust. This helps ensure every bite is filled with delicious cherry goodness.
- Check for Doneness: Keep an eye on baking time; check if they’re golden brown on top. Overbaking can lead to dry bars, while underbaking may result in sogginess.
- Let Cool Completely: Allowing the bars to cool fully before cutting helps them hold their shape better, making for neater slices.
- Experiment with Flavors: Feel free to mix in other fruits or flavor extracts. Adding lemon zest can give an extra zing, enhancing the overall profile of your dessert.
Best Side Dishes for Easy Cherry Pie Bars: A Simple Cherry Dessert to Savor
While these easy cherry pie bars are delicious on their own, pairing them with complementary side dishes can enhance your dessert experience. Here are some great options:
- Fresh Fruit Salad
A vibrant mix of seasonal fruits adds freshness and balances sweetness from the bars. - Cheese Platter
Include mild cheeses like brie or goat cheese; they provide a creamy contrast to the tartness of cherries. - Yogurt Parfait
Layer yogurt with granola and berries for a healthy accompaniment that contrasts nicely with rich desserts. - Mini Cheesecakes
These creamy bites add variety and richness, making them an excellent partner for cherry pie bars. - Coconut Macaroons
Chewy macaroons offer a sweet coconut flavor that pairs well with cherries while adding texture diversity. - Chocolate-Covered Strawberries
These indulgent treats add elegance and complement the fruitiness of your main dessert beautifully. - Lemon Sorbet
A refreshing sorbet provides palate-cleansing qualities between bites, enhancing your dining experience. - Caramel Sauce Dipping Cups
Small cups of warm caramel sauce allow guests to dip their bars, adding an extra layer of flavor fun!
Common Mistakes to Avoid
When preparing Easy Cherry Pie Bars: A Simple Cherry Dessert to Savor, it’s important to avoid common pitfalls that can affect the outcome of your dessert.
- Skipping the Room Temperature Eggs: Using cold eggs can lead to uneven mixing. Make sure your eggs are at room temperature for the best texture.
- Overmixing the Dough: Overmixing can result in tough bars. Mix only until just combined to keep them tender and delicious.
- Not Preheating the Oven: Baking in an unheated oven can lead to uneven cooking. Always preheat your oven to ensure even baking.
- Using Low-Quality Cherry Filling: Cheap cherry filling may lack flavor. Choose a premium brand for a richer taste in your bars.
- Ignoring Cooling Time: Cutting them too soon will result in messy bars. Allow them to cool completely before slicing for neat pieces.
Storage & Reheating Instructions
Refrigerator Storage
- Store in an airtight container for up to 5 days.
- Place parchment paper between layers if stacking to prevent sticking.
Freezing Easy Cherry Pie Bars: A Simple Cherry Dessert to Savor
- Wrap tightly in plastic wrap and then foil for up to 3 months.
- Thaw overnight in the refrigerator before serving.
Reheating Easy Cherry Pie Bars: A Simple Cherry Dessert to Savor
- Oven: Preheat to 350°F (175°C), place bars on a baking sheet, and heat for about 10 minutes.
- Microwave: Heat individual bars on low power for 15-20 seconds until warm.
- Stovetop: Use a skillet over low heat, cover for a few minutes until warmed through.
Frequently Asked Questions
Here are some common questions about making Easy Cherry Pie Bars: A Simple Cherry Dessert to Savor.
Can I use fresh cherries instead of canned filling?
Yes, you can use fresh cherries! Just pit and slice them, then mix with sugar and cornstarch before spreading on the crust.
How do I make these bars gluten-free?
Simply substitute all-purpose flour with a gluten-free flour blend to accommodate gluten sensitivities without losing flavor.
What variations can I try with this recipe?
Feel free to add different fruits like blueberries or peaches, or mix in nuts for added crunch!
How long do these bars last?
Easy Cherry Pie Bars can be stored in the refrigerator for up to 5 days or frozen for up to 3 months.
Final Thoughts
These Easy Cherry Pie Bars: A Simple Cherry Dessert to Savor are delightful and versatile. Perfect for any occasion, they can be customized with various fillings or toppings. Try making them today and enjoy their sweet and tart flavors!
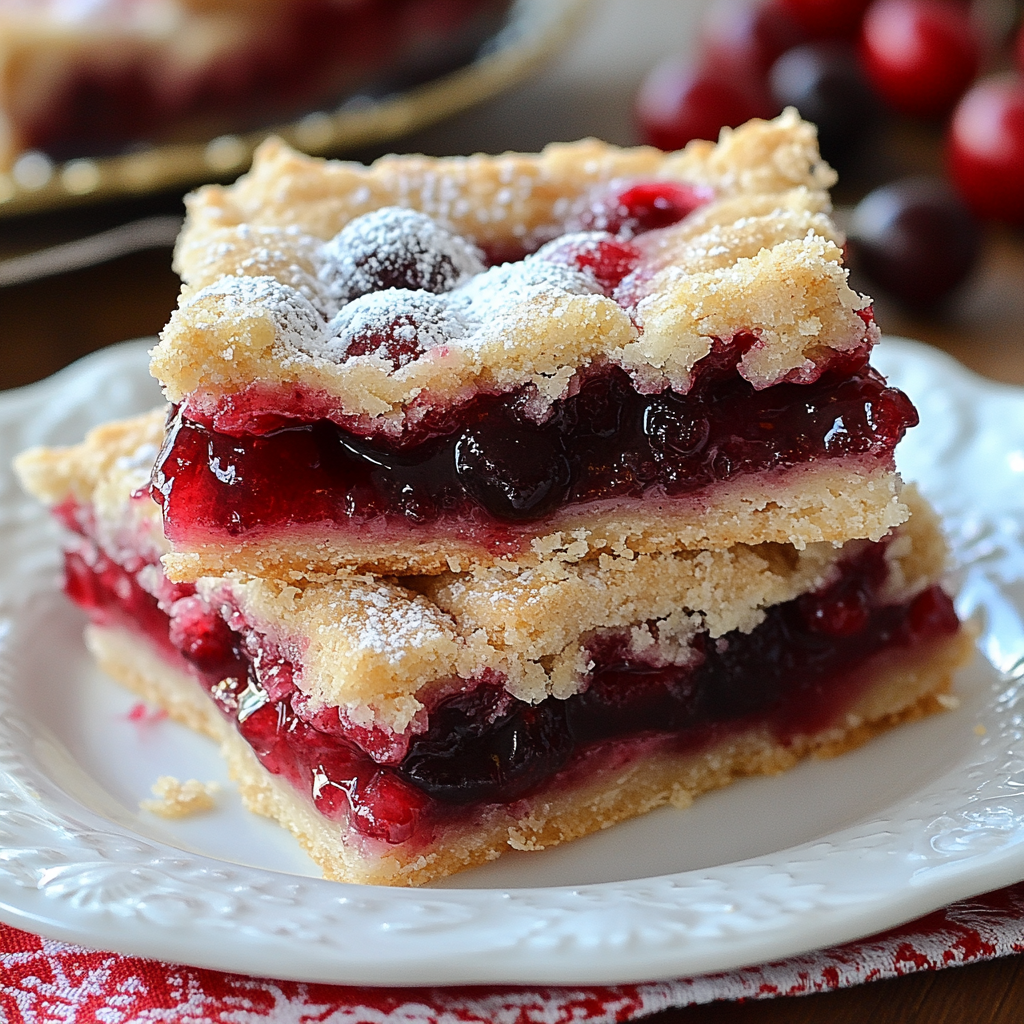
Easy Cherry Pie Bars: A Simple Cherry Dessert to Savor
Experience the joy of homemade desserts with these Easy Cherry Pie Bars: A Simple Cherry Dessert to Savor! Perfect for busy families, students, or anyone looking for a quick treat, this recipe combines sweet cherries and a hint of almond extract into delectable bars. They come together in under an hour, making them an ideal choice for last-minute gatherings or everyday indulgence. With a buttery crust and a delightful glaze, these cherry pie bars are sure to become a favorite in your home. Serve them warm with a scoop of ice cream or alongside fresh fruit for an enhanced experience. Discover how easy it is to create this classic dessert that will bring smiles around the table!
- Prep Time: 15 minutes
- Cook Time: 35 minutes
- Total Time: 50 minutes
- Yield: About 12 servings 1x
- Category: Dessert
- Method: Baking
- Cuisine: American
Ingredients
- 1 cup softened butter
- 1 cup sugar
- 2 large eggs
- 1 tsp almond extract
- 2 ½ cups all-purpose flour
- 1 (21 oz) can premium cherry pie filling
- 1 cup confectioners’ sugar
- 1 tsp almond extract
- ½ tsp vanilla
- Milk as needed
Instructions
- Preheat your oven to 350°F (175°C).
- In a mixing bowl, cream together the softened butter and sugar. Add eggs one at a time, followed by almond and vanilla extracts.
- In another bowl, whisk together flour and salt. Gradually combine the dry mixture with the wet ingredients until just mixed.
- Grease a 9×13-inch baking pan and press half of the dough into the bottom.
- Spread cherry pie filling evenly over the dough.
- Drop spoonfuls of the remaining dough on top of the cherries.
- Bake for 35–40 minutes until golden brown.
- Cool completely before glazing with confectioners’ sugar mixed with almond extract, vanilla, and milk.
Nutrition
- Serving Size: 1 bar (45g)
- Calories: 180
- Sugar: 12g
- Sodium: 100mg
- Fat: 8g
- Saturated Fat: 5g
- Unsaturated Fat: 3g
- Trans Fat: 0g
- Carbohydrates: 25g
- Fiber: 1g
- Protein: 2g
- Cholesterol: 40mg